Introduction to How to Draw a Horse
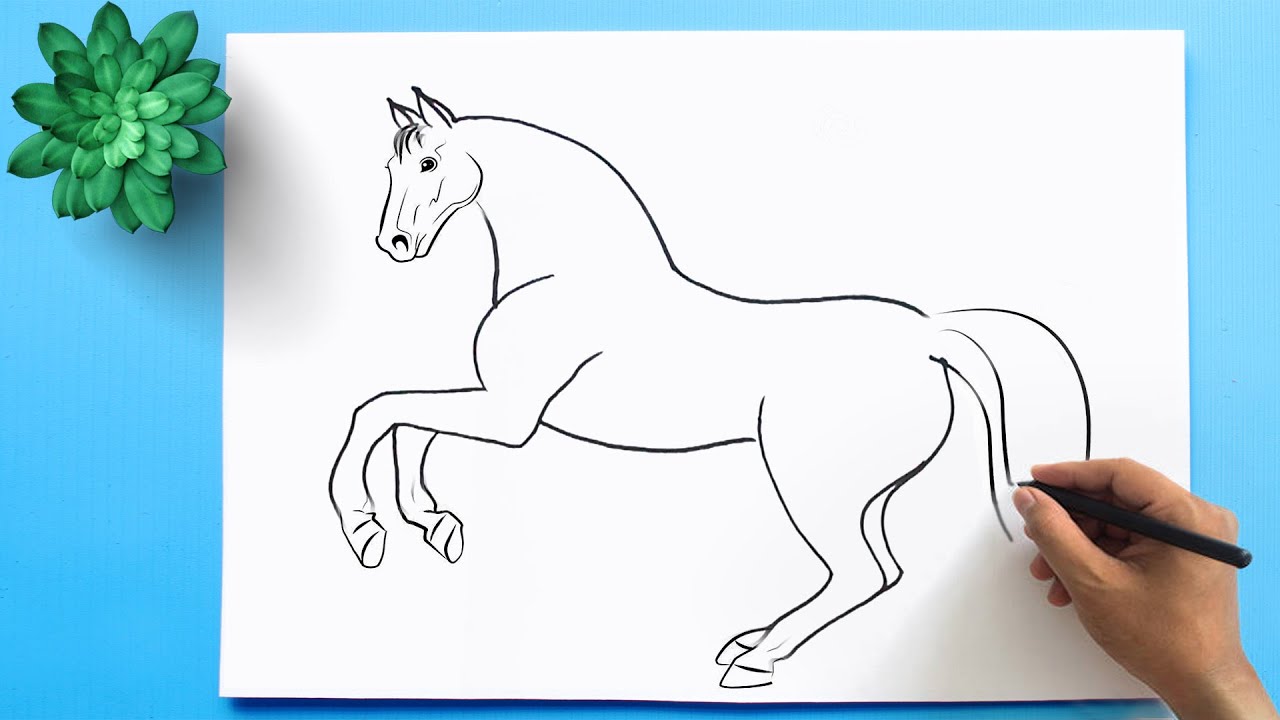
How to Draw a Horse? Are you an aspiring artist who has always been fascinated by the graceful beauty of horses? Drawing a horse may seem challenging at first, but with a little guidance and practice, you can create stunning equine artwork that captures the essence of these majestic creatures. In this step-by-step guide, we will walk you through the process of drawing a horse, from basic shapes to fine details, so you can unleash your inner artist and bring these magnificent animals to life on paper.
Step 1: Gather Your Materials
Before you start drawing, you will need some basic materials. Here’s what you’ll need:
- Paper: Choose a high-quality paper that is suitable for your preferred drawing medium, such as pencil, charcoal, or pastel.
- Pencils: A set of graphite pencils with different hardness levels (e.g., H, HB, and B) will allow you to create a range of tones.
- Eraser: A kneaded eraser or a soft gum eraser will help you correct mistakes and achieve clean lines.
- Reference Image: Find a clear reference image of a horse that you would like to draw. You can use a photograph or a printout as a guide.
Step 2: Start with Basic Shapes
Begin by lightly sketching basic shapes to establish the proportions and pose of your horse. Start with a circle for the head and an oval for the body. Connect them with a curved line to indicate the neck. Add two circles for the shoulders, and elongated ovals for the legs. These shapes will serve as the framework for your horse drawing and will help you get the overall proportions right.
Step 3: Refine the Body and Head
Using your reference image as a guide, start refining the body and head of your horse. Add more details to the head, such as the eyes, nostrils, and mouth. Pay close attention to the shape and placement of the ears. Sketch the neck and chest with gentle curves, and define the back and hindquarters with flowing lines. Refine the legs, adding muscle definition and hooves. Remember to keep your lines light and adjust them as needed to get the proportions just right.
Step 4: Add Details to the Face
The face is the most expressive part of a horse and requires careful attention to detail. Use your reference image to guide you as you add the eyes, nostrils, mouth, and ears. Pay close attention to the placement and size of these features to capture the horse’s likeness. Use short, light strokes to add shading and texture to the face, creating the illusion of fur and depth. Don’t forget to add the forelock, which is the mane that falls between the horse’s ears.
Step 5: Define the Mane and Tail
The mane and tail are defining features of a horse and can add a sense of movement and dynamism to your drawing. Use flowing lines to define the shape and direction of the mane and tail. Pay attention to the individual strands of hair, using short, curved lines to add texture and volume. You can also use shading to create depth and dimension in the mane and tail.
Step 6: Refine the Body and Legs
Once you have defined the head, face, mane, and tail, you can focus on refining the body and legs. Pay close attention to the curvature of the spine, the placement of the shoulders, and the angle of the legs. Add muscle definition and shading to create a sense of three-dimensionality. Use a combination of light and dark tones to create highlights and shadows that give your drawing depth and form.
Step 7: Final Touches and Clean-up
Now that you have captured the basic form and details of your horse drawing, it’s time to add the final touches and clean up your lines. Use an eraser to gently remove any stray or unnecessary lines, and refine the contours of your horse to make them clean and smooth. Pay close attention to the areas where light hits the horse’s body, such as the muzzle, shoulders, and haunches, and add highlights with a light pencil or white charcoal to create a sense of shine and texture.
Step 8: Add Background and Details
To complete your horse drawing, you can add a background and additional details. You can create a simple background using basic shapes or add more complex elements, such as a landscape or a barn, to provide context and depth to your drawing. Pay attention to perspective and use appropriate shading and detailing techniques to create a sense of distance and depth in the background.
You can also add additional details to your horse drawing, such as harnesses, saddles, or markings on the coat. Again, use your reference image to guide you as you add these details, paying attention to their placement and proportions.
Step 9: Evaluate and Adjust
Once you have finished adding all the necessary details, take a step back and evaluate your drawing. Look for any areas that may need further adjustment, such as proportions, shading, or details. Make any necessary corrections or additions to ensure that your horse drawing looks balanced, accurate, and visually appealing.
Step 10: Sign and Share Your Artwork
Congratulations, you have successfully drawn a horse! To add the final touch to your artwork, sign your name or initials in a discrete corner of your drawing to claim it as your own. You can also date your drawing to mark the moment of its creation.
Don’t be afraid to share your artwork with others! You can showcase your horse drawing in your portfolio, share it on social media, or even enter it into art contests. Be proud of your accomplishment and continue to practice and improve your skills as an artist.
Conclusion
Drawing a horse may seem challenging, but with patience, practice, and attention to detail, you can create a stunning equine artwork that captures the beauty and grace of these magnificent animals. Follow these step-by-step instructions, use a reference image as a guide, and don’t be afraid to experiment with different techniques and styles to develop your unique artistic voice. So, grab your pencils, paper, and reference image, and let your creativity soar as you bring a horse to life on your canvas! Happy drawing! Hope you now know about How to Draw a Horse?


